Well hi there everyone, today is the first ever Technique Tuesday from Queen Pip Cards – and I’m featuring Water and Ink this month! I’m very excited about this as it will be the first YouTube video I’ve ever done and this is the official launch of it!
 I’ve wanted to do videos for a while, and many of you remember I was videoed by Stampin’ Up! UK for their Stampissimo Channel last September. Since then I’ve been investigating how to record, edit and upload and also really thinking about what I wanted to share videos about.
There are so many wonderful videos on YouTube already, I wanted to know what I could offer too. So after thinking about it long and hard, I decided that I wanted to offer videos for the person who either has never crafted before, or has all the stuff but doesn’t remember how to use it! I want to reach those of you out there who say to me “Oh I’m not creative” or “I’ve got stuff and I never use it” or “How do I do this Pip”; but I wanted to keep it SHORT – I’ve spent hours in front of videos that waffle on about everything and nothing for minutes, I prefer those who cut to the chase – show you want you need to do and then let you get going and do it yourself!
So my Technique series seemed like a good starting point. Last Saturday I kicked off my 6 class series with Water and Ink and we had a blast! We got a bit inky (but not too much) and we created a whole lot of beautiful things. One of which is the subject of today’s video.
So if you want to learn one technique for using Water and Ink – in less than 5 minutes – click the link and tell me what you think! As I said, it’s my first and I hope I’ve done everything right – so if you can’t see it I apologise and will fix it as soon as possible!
If you’d like to purchase any of the items you see on the video to help you make this card, then please click the items below.
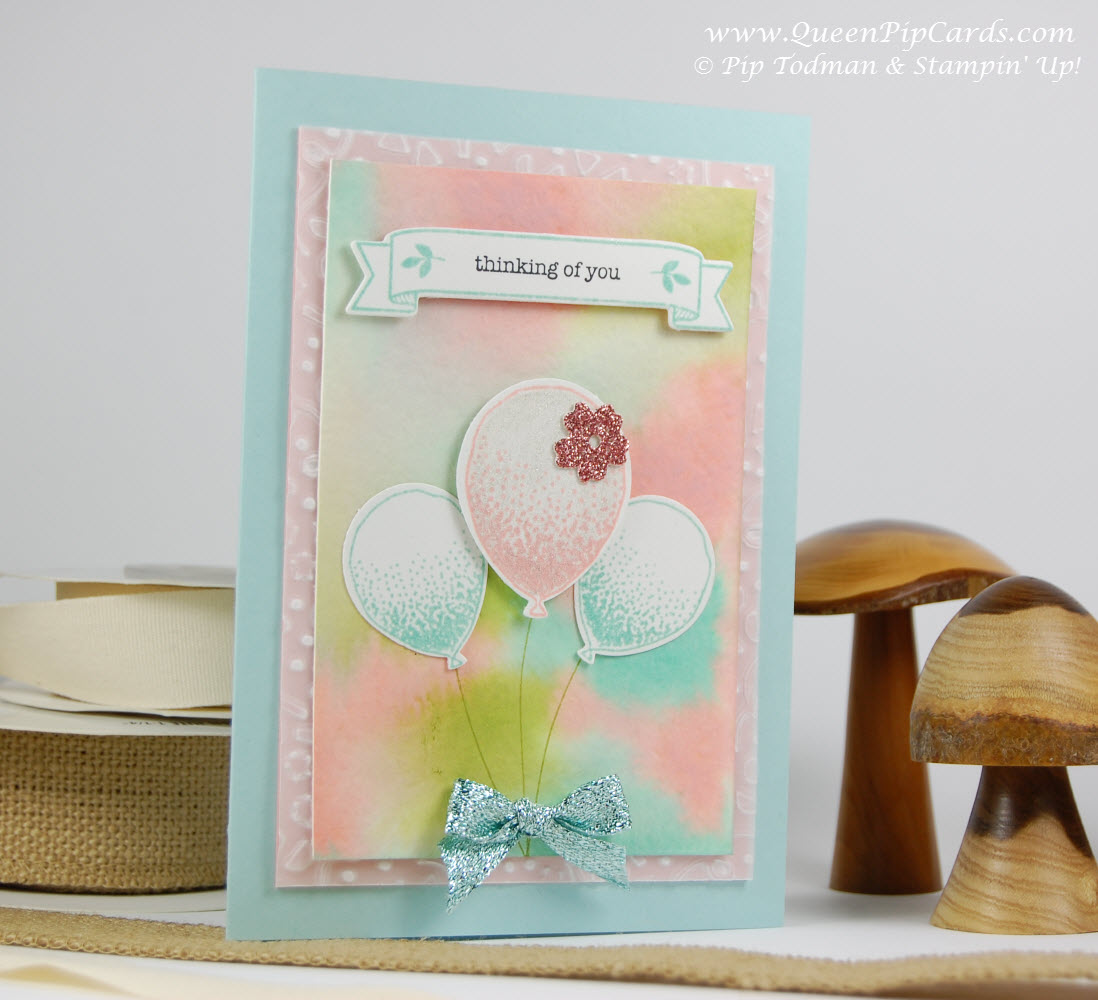
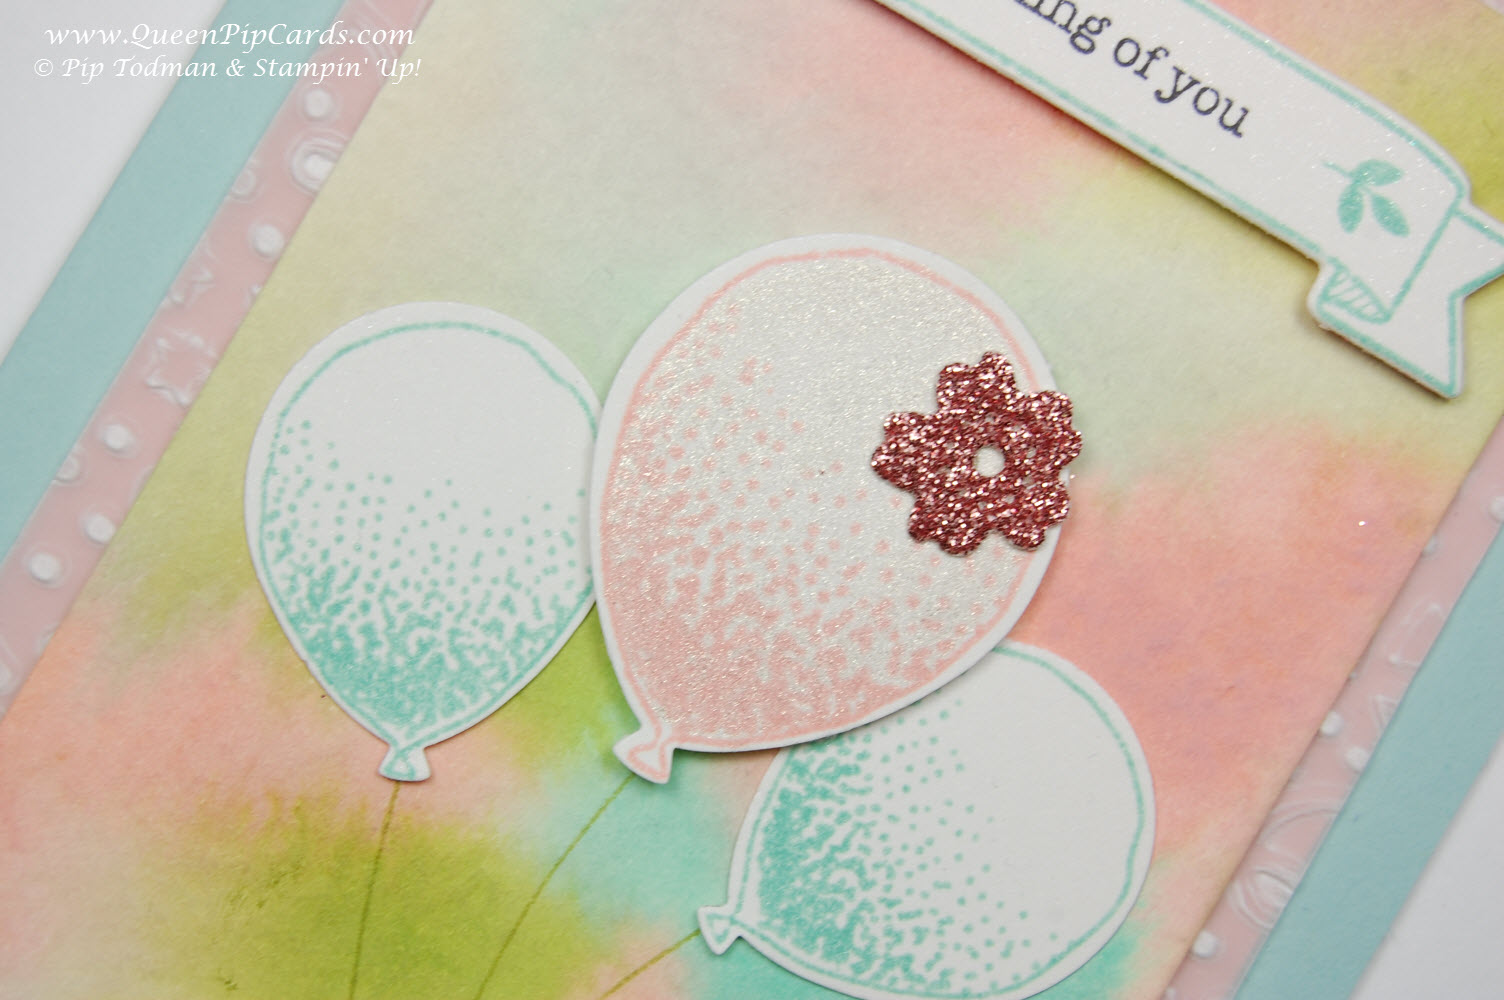
Measurements are:
- Pool party base A5 (A4 cut in half with long side at the top at 14.9cm)
- Blushing Bride mat 13.9 x 9.5cm
- Vellum embossed using the new Confetti Embossing Folder 13.9 x 9.5cm
- Watercolour cardstock 12.9 x 8.5cm
- Reinker / Re-fill colours used Pear Pizzazz, Blushing Bride and Pool Party.
Until next Sunday, happy inking and please comment below and let me know what I can improve on! Thanks, Pip
0 Comments